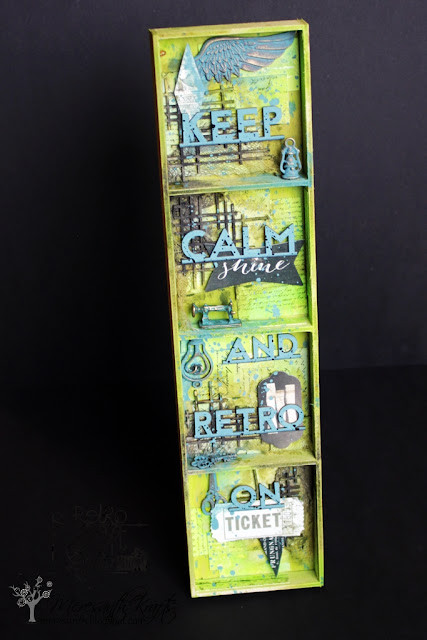
Cześć! Dziś zapraszam Was na zdjęciowy tutorial dokumentujący proces powstawania lekko mediowego shadowboxa o czterech przegródkach. Zamysł był taki, by każda przegródka miała podobną bazę i charakter, ale inne dodatki i by sentencja 'keep calm and retro on' była elementem łączącym box w całość.
Hello all! Today I would like to share with you a tutorial which documents the creative process behind a gently-mixed-media shadowbox with four compartments. The idea was to build each compartment so that they all share the same base and are of the same character, but different embellishments and that 'keep calm and retro on' is a motto which binds the parts together.
Jako bazy boxa użyłam drewnianego opakowania po żywicznych dodatkach. Zaczęłam od wyłożenia go kawałkami papierów Prima Paintable, które stworzone są po to, by dobrze przyjmować media.
As my shadowbox base, I used an old wooden piece of packaging that some resin embellishments came in. I started by filling it with pieces of Prima Paintable papers, which absorb media really well.
Następnie cały box spryskałam zielonymi odcieniami mgiełek Distress - Shabby Shutters ('brudna' zieleń) i Twisted Citron (jasna, żywa zieleń).
Next, I sprayed the whole box with Distress Sprays - Shabby Shutters ('dirty' green) and Twisted Citron (bright, vibrant green).


Do każdej przegródki trafił potem kawałek świetnego kraciastego tekturkowego tła SnipArt oraz kawałek gazy.
Each compartment then got a piece of the great grid chipboard background from SnipArt and a piece of gauze.
Po przyklejeniu nowe elementy również spryskałam mgiełkami, a następnie wzięłam się za ich cieniowanie za pomocą kredek Distress Crayons. Użyłam kolorów Peeled Paint i Black Soot, zielonym obrysowując tekturkę dookoła, a czarnym mażąc po niej bezpośrednio. Pigment z kredek rozprowadziłam za pomocą pędzelków na wodę.
After gluing down the new elements, I sprayed them with the mists, too, and then went on to do some shading with Distress Crayons. I used Peeled Paint and Black Soot, using the green to trace around the chipboard pieces and the black on top of them. I spread the pigment from the crayons around with water brushes.


Tło w każdej przegródce gotowe, przyszła więc pora na planowanie wypełnienia dodatkami.
With the background of each compartment ready, the time came to plan the filling.
Oprócz tekturkowego napisu użyłam naklejek z zestawu papierów Prima Salvage District A4 i metalowych elementów.
Apart from the chipboard inscription, I used stickers from the Prima Salvage District A4 paper set and metal embellishments.
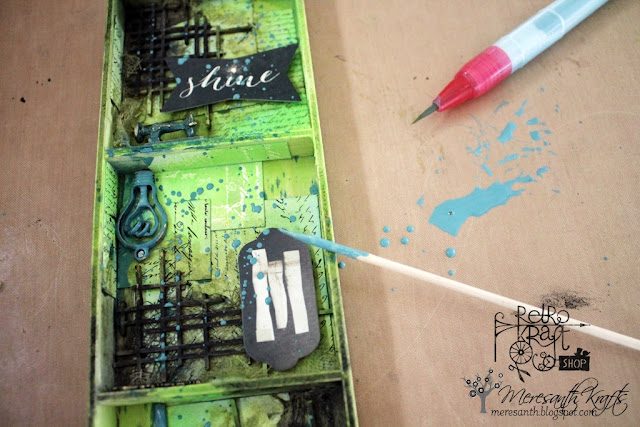
Po przyklejeniu dodatków podrasowałam je odrobinę używając farby DecoArt Antiquing Cream w kolorze Patina - używając znów pędzelka z wodą, pozwoliłam farbie 'popłynąć' też dookoła malowanych elementów, brudząc obszary dookoła nich. (Odcień farby świetnie pasuje do patynowych metalowych dodatków, miniaturki maszyny do szycia nie musiałam więc malować :) ).
After I glued down the embellishments, I spiced them up a bit using DecoArt Antiquing Cream in Patina - using the water brush again, I let the paint drip and spread around the metal embellishments, too. (The colour of the paint matches the colour of metal patina elements perfectly, so I didn't have to paint the sewing machine miniature, which came already patina'd :) ).
Tą samą farbą wykonałam też chlapania za pomocą patyczka.
I used the same paint to create some splashes with a stick.
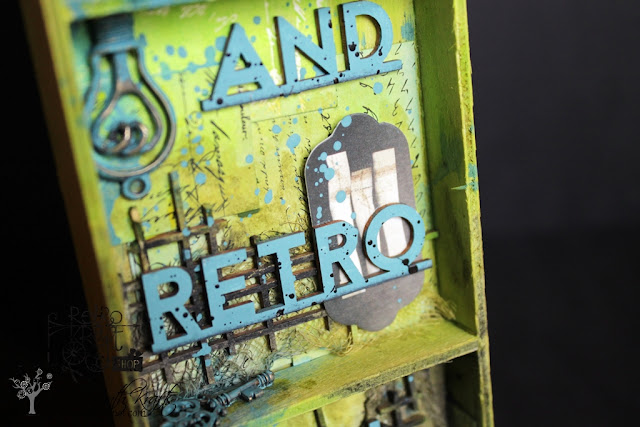
Patynową farbą pokolorowałam też tekturkowy napis, a następnie pochlapałam go czarną farbą akrylową, by nadać my trochę więcej charakteru.
I used the patina paint to colour the chipboard words, too, and then splashed a little with black paint to add some more character.
W międzyczasie farba na metalowych elementach zdążyła wyschnąć. Zdjęłam jej nadmiar trąc mokrą chusteczką, dzięki czemu metal częściowo wyłonił się spod koloru, a całość nabrała bardziej postarzonego wyglądu.
In the meantime, the paint on the metal elements had dried. I then removed it partly by rubbing with a wet wipe, which made the metal partly reappear and gave everything a more weathered look.
I gotowe! Tak prezentuje się mój zielono-patynowy box.
Done! This is what my green-patine box looks like.
Mam nadzieję, że wśród technik wykorzystanych przy tym projekcie znajdziecie dla siebie coś ciekawego. :) Pozdrawiam ciepło.
I hope you will find some of the techniques I used while making this project interesting. :) Hugs.
Użyłam: / I used:


super efekt!
OdpowiedzUsuńCieszę się, że się podoba! :)
UsuńΥπεροχη δουλεια!!!!!!
OdpowiedzUsuńΕυχαριστώ!
UsuńΥπεροχη δουλεια!!!!!!
OdpowiedzUsuńŚwietny tutek :)
OdpowiedzUsuńDziękuję. :)
Usuńwhere can i see this months challenge post...
OdpowiedzUsuńWe're currently in-between challenges. :) The next Retromania challenge will start on 17th October. Join us then!
Usuń